|
The Test: The images below represent my best attempts at using dedicated film grain removal software, Photoshop noise reduction features or blurring tools, and Photoshop grain removal plug-ins to rescue an old film image that suffers from excessive grain.
I have attempted to make this comparison between different grain removal tools as fair as possible, and have not used any other processing techniques to enhance the images. The goal in each case was to achieve an aesthetic balance between removing film grain and maintaining a reasonable amount of detail. The Software: Visual Infinity's - Grain Surgery, Neat Image's - Neat Image, Pleiades-Astrophoto's - SGBNR, and Adobe's - Photoshop Smart Blur The Results: My opinion is that Grain Surgery and SGBNR give the best overall results. The difference between the two is interesting. I will let the images do the talking but here are some general observations. Grain Surgery can produce a smooth result, but with noticeable artifacts and a slight softening of the image. However it does a very good job of preserving low contrast detail. Faint stars, and definition of the low contrast streamers in the tail is well preserved. While the artifacts are a little distracting when viewed on the full size image, its capacity to preserve the low contrast detail seems to produce a better image than the other tools can produce when the image is rescaled downwards. SGBNR, However, can produce a smoother, sharper, artifact free result. Full size images are remarkably faithful toward the goal of removing grain, and high contrast features are sharp. Where SGBNR seems to suffer is in the preservation of low contrast features. Faint stars, and the low contrast features in the comet tail become faint or blurred. When re-sampling the image downwardly, these features are all but lost. Because of this the thumbnail image does not do justice to the generally excellent full size results. Ease of Use: Comparing the leaders in this test, it quickly became obvious that without question Grain Surgery is by far the easiest to use. There are few options that require adjustment. For obvious reasons, this is both its strength and its weakness. Getting a good result is very easy; getting a precisely optimized result that perfectly balances sharpness, grain removal, and preservation of detail can be compromised by lack the lack of options and the potential introduction of artifacts. SGBNR is difficult to use, primarily because it lacks a real-time preview as settings are adjusted. It is not remotely intuitive how the various settings affect the image or how they interact with one another. It does, however, offer what appear to be comprehensive sets of controls that allow very precise adjustment of the image. To get really excellent results with SGBNR, be prepared to spend a lot of time fiddling with these settings. You Perform the Test: All the other utilities produce more noticeable artifacting, or mottling, or tend to lose detail as they are pushed to achieve a smooth result. In all fairness, however, I am not expert at using any of these particular utilities, and am open to suggestions for improving this comparison. You are welcome to download the original file, and perform this test yourself; I would be very interested in seeing the results you achieve. |
|
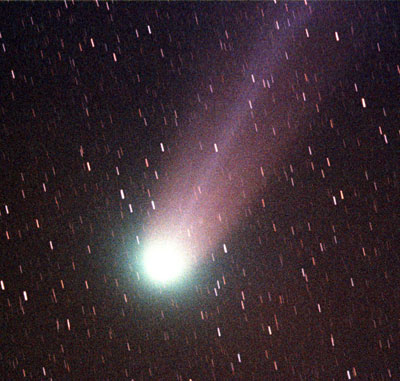 Raw film image of Comet Hyukatatake (click on images for the larger - original versions) Download original TIF file if you would like to experiment (1.788 kb) Download this "Zipped" File if you are having trouble downloading the TIF file. |
|
TESTING GRAIN SURGERY & PHOTOSHOP SMART BLUR |
|
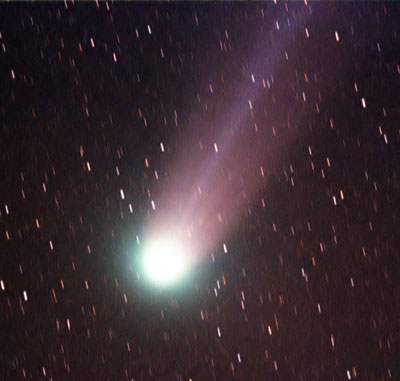 My Best Attempt Using: Grain Surgery |
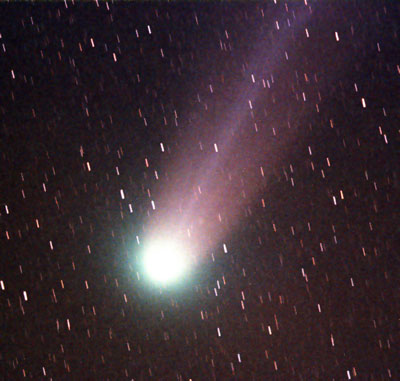 My Best Attempt Using: Photoshop Smart Blur |
Noise Reduction = 100 % Degraining Passes = 3 Noise Model = Multiplicative Degraining Mode = Single Channel Number of Samples = 8 Sample Size = 24 Manual Samples = OFF Unsharp Mask = 0% Radius = 2 Pixels Threshold = 24 Pixels |
Radius = 1.7 Pixels Threshold = 21.5 Quality = Low Mode = Normal |
TESTING NEAT IMAGE |
|
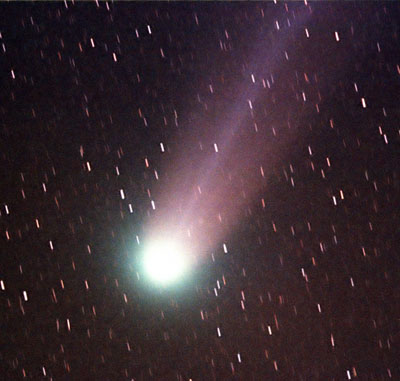 My Best Attempt Using: Neat Image |
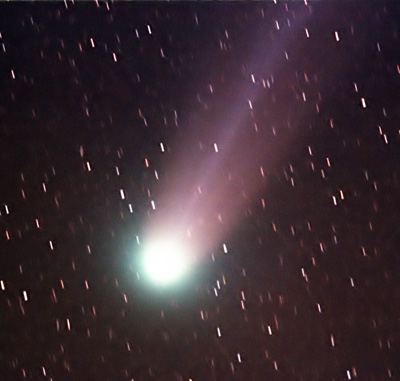 Manufactures Attempt: Neat Image |
Noise Filter High = 0% Noise Filter Mid = 0% Noise Filter Low = 0% Channels (All) = 0% Amount = 50% Noise Profile = Selection (1/3 Coma, 1/3 Tail, 1/3 Sky) |
Noise Filter High = 90 % Noise Filter Mid = 40 % Noise Filter Low = 0 % Channels (All) = 0% Amount = 80% Noise Profile = Provided (for Version 1.1 Demo) |
TESTING SGBNR |
|
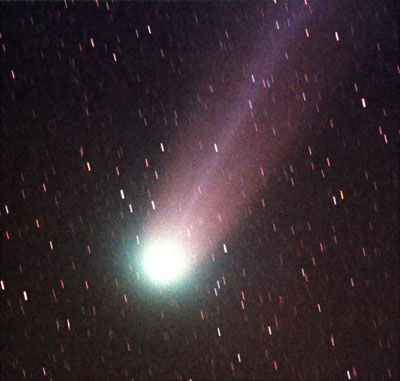 My Best Attempt Using: SGBNR V1.0.7.45 Beta |
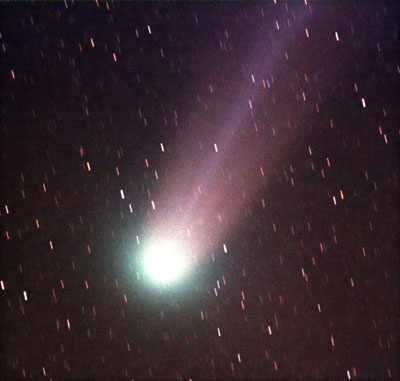 Manufactures Attempt: SGBNR V1.0.7.45 Beta |
Channel-Specific Parameters |
Channel-Specific Parameters |
(Addresses loss of highlight detail with improved edge protection algorithm) Manufacture Recommended Settings: Channel-Specific Parameters |
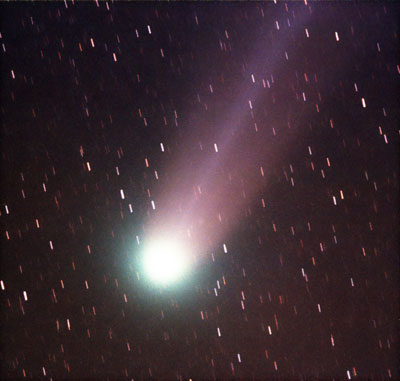 Manufactures Attempt: SGBNR V1.0.8.49 Beta |
|
Home - WhirlpoolGalaxy.com |
|